Wednesday, August 31, 2011

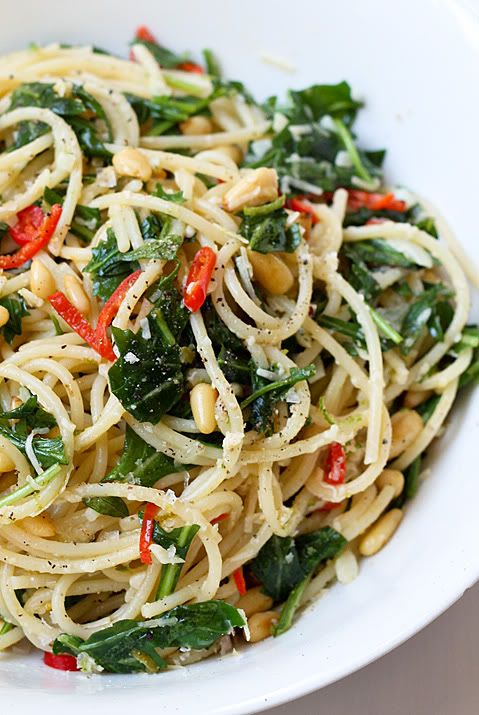
Chilli & Lime Spaghetti


My goodness! I've been slack and haven't posted in ages. I thought I'd get things back on track by posting my lunch today. I felt like something with limes and chillies. It's such a tasty combo. So refreshing. And since I'm fighting off a cold that I may be getting I added some garlic. If you make this recipe you probably don't need to add as much as I did. :) Anyway here is the recipe.

Chilli & Lime Spaghetti

Serves one hungry person (aka me today) or two for a light meal.

Spaghetti (a bunch about the diameter of a 10 cent piece)
1 tsp Salt
2 tsp Olive Oil
3 cloves of Garlic, finely chopped
2 Chilies, deseeded & finely sliced
Zest of one Lime
1/3 Rocket, roughly chopped
2 Tbsp Pine Nuts
Juice of one Lime
Salt & Ground Pepper to serve
Parmesan Cheese to serve

In a medium sized pot bring water to the boil, once boiling add 1 tsp of salt then the spaghetti. You want to cook the spaghetti until al dente, about 8-10 minutes.
While the spaghetti is on, in a frying pan heat olive oil on a medium heat, add garlic and cook for about 30 seconds. Add chilli and cook for a further 30 seconds. Turn off heat and add the zest of one lime and rocket. Mix through to combine all ingredients.
When the spaghetti is done, drain thoroughly and add to frying pan. (which is off the heat).
With tongs thoroughly coat all of the spaghetti then add it all to a serving dish.
Reheat the frying pan on a medium heat and roast the pine nuts until golden, about 1-2 minutes.
Top the dish with the pine nuts and squeeze over the juice of one lime.
Season with salt and pepper and serve with parmesan cheese.

Friday, July 22, 2011

How to Eat a Hug ...


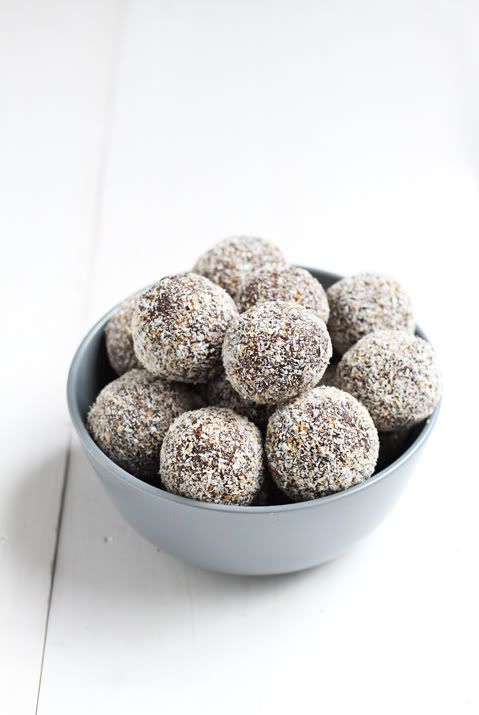
Eating a hug ... that's the best way I can describe these treats :) Yum! I've made them countless times so I thought I'd better share the recipe.
They are fairly ... actually in my book they are VERY guilt free! Dairy free, vegan, gluten free, and hold the phone they're sugar free too! Well sort of ... I found a loop hole, there is a bit a maple syrup in there for sweetness.

I don't have a name for them so they can just be coconut/ cocoa/ almond/ date-ish ball things for now. I'd love some name suggestions. :)

Here's the recipe:

Ingredients

400g Dried Pitted Dates
1/4 cup Psyllium Husk*
1/4 cup Rice Bran Oil
2 tbsp Maple Syrup
1 tsp of Vanilla Bean Paste**
1/4 cup Cocoa Powder
1/2 tsp Cinnamon
1/8 tsp Salt
1/2 cup (50g) Fine Desiccated Coconut
1 cup (160g) Blanched Almonds

+ a second measure of 1/2 cup (50g) of coconut for coating them at the end.
Either fine desiccated or shredded. I prefer shredded, it's a little fancier.

*Can substitute the psyllium husk for wheat germ, LSA mix or whatever is in your cupboard of the same texture and taste.
**Use essence if you don't have paste, but keep in mind that paste is so much better!
(for this recipe you need a food processor)


Method

Put all the ingredients except the coconut and almonds in a food processor, blend/pulse until the mixture resembles a paste like texture.
Transfer the mixture into a large bowl.
Put the almonds in the empty food processor and pulse until they are roughly chopped, add to the bowl with the first measure (1/2 cup) of coconut.
At this point you'll have to get your hands in there to combine the mixture evenly.
Once you've got a good consistency you can divide and roll the mixture into small balls (2 cm diametre).
Use the second measure of coconut to coat the balls. (I like to toast the coconut slightly before coating them).
Put them in the fridge in an air tight container for a few hours before eating to allow them to set. If you can refrigerate them overnight, even better!
Then eat!!

Sunday, July 10, 2011

The Start Of My Zero Waste Addiction.


The zero waste home blog. I came across it here only a few weeks ago at Danelle Bourgeois' tumbler. She posted the above video which lead me to the blog. The zero waste blog is written by Bea Johnson. Five years ago, she (and her family) decided to move into a smaller home. They downsized their belongings and took on a zero-waste style of living. The above video explains it all. She has got so many great tips on her blog for reducing waste, I've taken on most of the ones I've read so far, like she says in the video, it's very addictive. In the past two weeks I've been occupied with de-cluttering, reducing, reusing and shopping in the right places. I've donated three station wagon boot loads full of house stuff that I don't need anymore to second hand stores. I've made a compost bin for food waste. I've put up a much needed 'No Junk Mail' sign on the letterbox. I'm shopping at markets where I can get my own bags and containers filled no problem (laundry mesh bags for mushrooms, beans, loose lettuce etc). Refilling my egg trays. Using a canvas bag for bread at the bakery which tastes better and is fresher anyway. At the supermarket I'm opting to buy things that last in bulk rather than buying small bottles and jars, that is until I have more jars/bottles to refill etc. Phew! Like I said ... it's addictive. We've already reduced our rubbish and recycling by half. I had been wanting to do something about the sad state of our overfilled rubbish bins (recycling included) for a while now and Bea Johnson's blog seemed to kick it into gear.

I decided to make this post for people living in Melbourne as a resource for great places to buy produce from. Please do comment if you have more links to add.


and of course check out the zero waste home blog. :)

http://zerowastehome.blogspot.com/

Thursday, June 9, 2011

What if the hokey pokey is what it's all about?


Yesterday I made ice cream and it was a success. Surprisingly! It's a lot easier to make than what I thought. It's pretty much just like making custard and freezing it. I made hokey pokey ice cream for nostalgic reasons. It's a bit of a New Zealand favourite.

To make it I grabbed a basic vanilla ice cream recipe online and used the old faithful Edmonds Cookbook for the hokey pokey. Since I don't have an ice cream maker I googled around for the how-to and found this guys blog post - david lebovitz. I've come across him before and definitely sounds like a bit of an ice cream expert. He makes it sound pretty easy, and turns out it is!

Recipes are below...(I added the hokey pokey about half way through freezing the ice cream)


Basic Vanilla Ice-Cream

(adapted from taste)


Ingredients

300ml thick cream

300ml milk

2 tsp vanilla bean extract

6 egg yolks

175g caster sugar


Method

Place the cream, milk and 2 tsp vanilla in a saucepan. Bring to the boil, then turn off the heat and set aside for 10 minutes to infuse.

Place the egg yolks and sugar in the bowl. Beat with an electric hand mixer until pale.

Carefully pour the milk over, then return to a clean saucepan.

Cook over low heat, stirring, for about five minutes until it is slightly thickened and coats the back of a wooden spoon.

(Keep the heat very low as you don't want to scrabble the egg yolks)

(This simple custard forms the basis of a classic ice-cream recipe.)

Set aside to cool, then refrigerate for 30 minutes.

Place custard in a plastic container in the freezer until frozen at the edges (about an hour). Remove from freezer. Beat with an electric beater. Re-freeze. Repeat this process two more times.

Leave until completely frozen, for best results leave over night.

(Alternatively, churn in an ice-cream machine according to the manufacturer's directions.)

Makes 1 Litre


Hokey Pokey


Ingredients

5 Tbsp of white sugar

2 Tbsp of golden syrup

1 tsp baking soda


Method

Line a baking tray with baking paper. Set aside.

Heat the golden syrup and sugar in a small saucepan over a medium heat.

Melt mixture and stir occasionally. Bring to the boil for 3 minutes -- make sure you stir continuously so the syrup doesn't burn.

Take the pot off the stove and stir in the baking soda. The mixture will froth up and become pale. Use a spatula to scrape and pour the mixture onto the baking paper.

Allow the honeycomb to set for 30 minutes.

Once set, wrap the honey comb loosely in parchment paper and use a rolling pin to break it into small pieces.


I have to say that home made ice cream surely is a whole lot better than store bought. Delicious! If you've never tried hokey pokey before then have a go at this recipe. Next time I'm going to make maple and walnut!


Monday, May 30, 2011

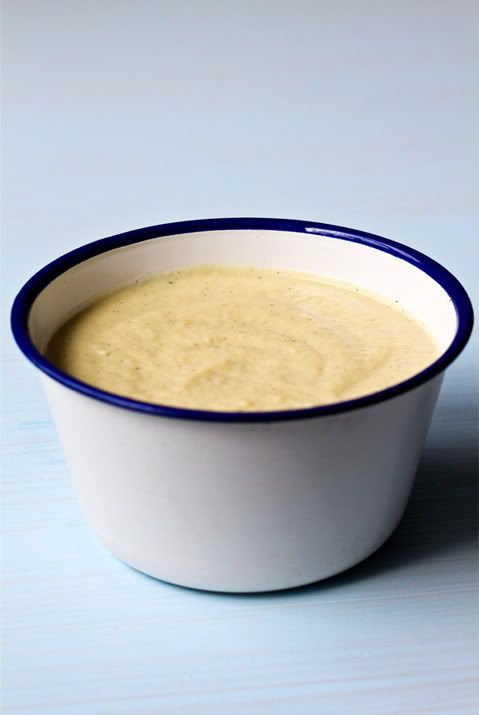
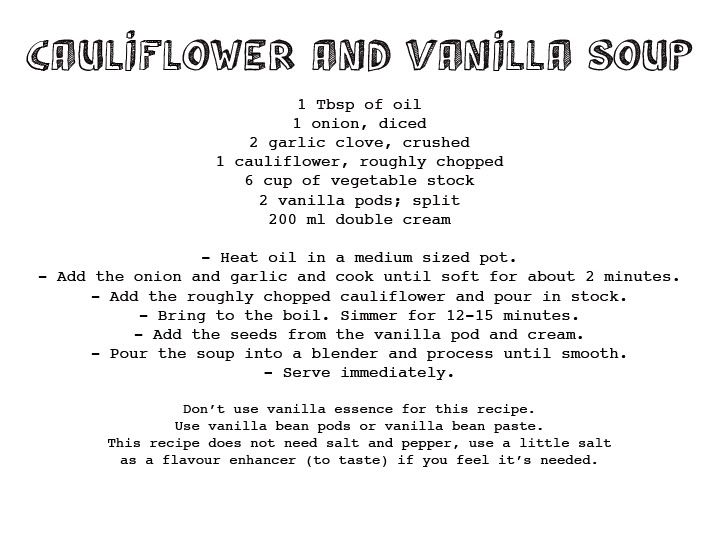
Cauliflower and Vanilla Soup


This soup makes a satisfying starter for any autumn dinner party with friends. A delicious flavour combo which not many would have tried! Surely a crowd pleaser.

I wrote these recipes for the Ceres Fair Food recipe page, which you can find here...
http://www.ceresfairfood.org.au/recipes/

Wednesday, May 18, 2011

Spiced Pear Tart.


Pears come into season just as the autumn cold hits us, so what better way to enjoy them than in this warm baked dessert!

I wrote these recipes for the Ceres Fair Food recipe page, which you can find here...
http://www.ceresfairfood.org.au/recipes/

Monday, May 2, 2011

chocolate chocolate chocolate...


So I figured since I haven't posted any sweet treats yet, chocolate would be a good start!
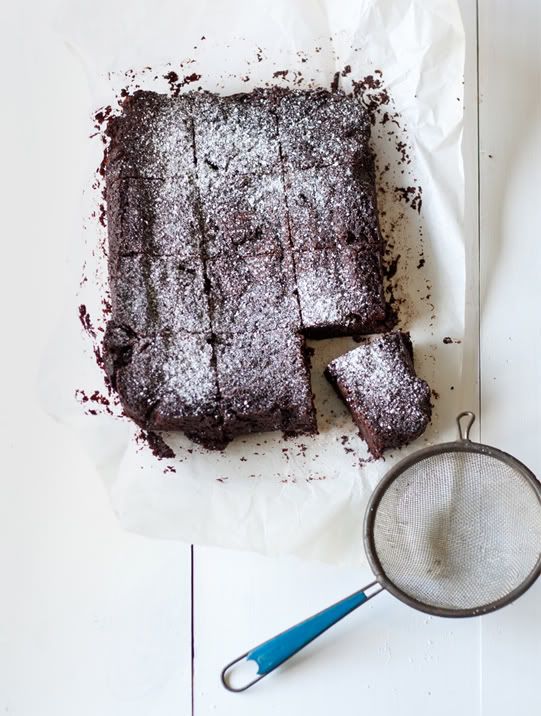
Just last week I did a shoot for a friends company called Koko Deluxe. They sell hot chocolate. So delicious! If you live in Melbourne, Wellington or London you might spot it in a cafe. If you do I suggest to get one! Anyway I photographed a lot of chocolate. Hot chocolate, powdered chocolate, grated chocolate, solid chocolate ... I think you get the point. Once I had finished the photos I found myself left with a 2.5 kilo block of amazing quality (you guessed it) chocolate. Oh what to do with it! After much deliberation I decided to make homemade brownies. With my quality control team standing by impatiently, I managed to snap a couple of photos without fingers in there before it got eaten! It was very yum.
For the record I used up about 200g of the block ... I'm sure you'll be seeing more of it soon in some form or another. So lets just say 'to be continued' for now.


Thursday, April 28, 2011


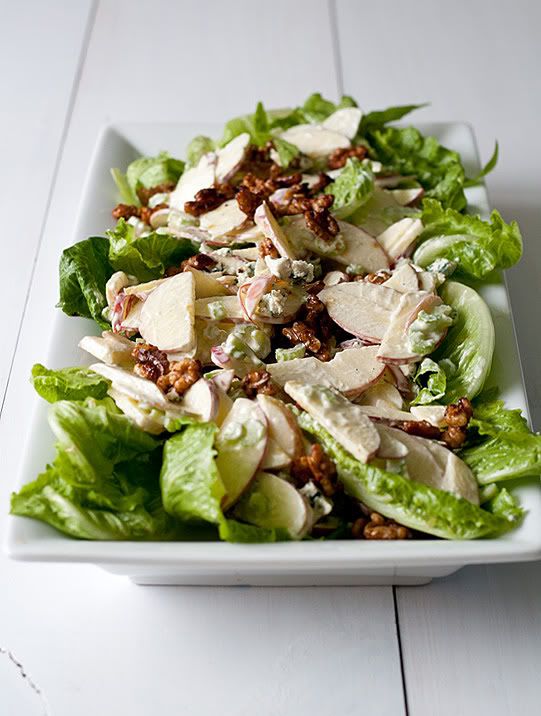
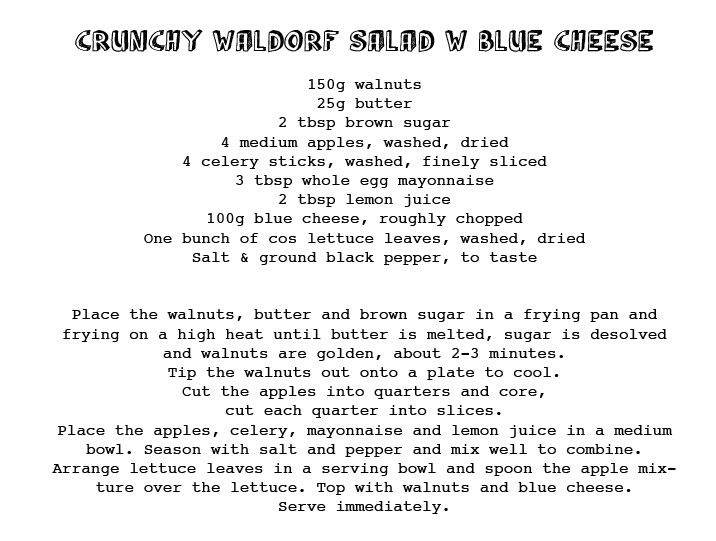
I love this salad. The last time I made something similar to this it was with pears, walnuts and blue cheese and no mayo. Which for the record is very yum. *sidenote* The first Waldorf Salad came from the Waldorf Hotel in NYC back in 1893. Originally it only had apples, celery, and mayonnaise in it. Walnuts were added later, good thing too! The recipe up the top there is one I've made up based on the Waldorf salad but with more good bits in it. Enjoy!


Tuesday, April 19, 2011

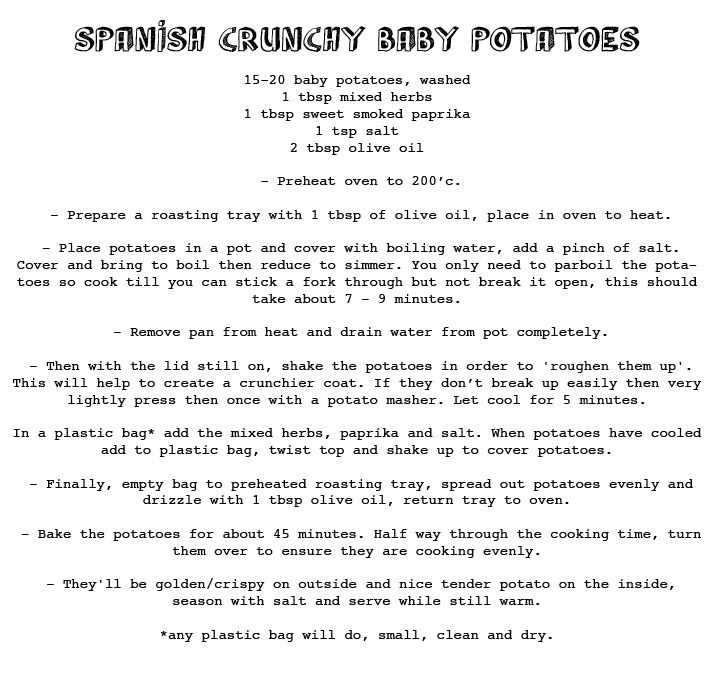
Spanish Crunchy Baby Potatoes ...
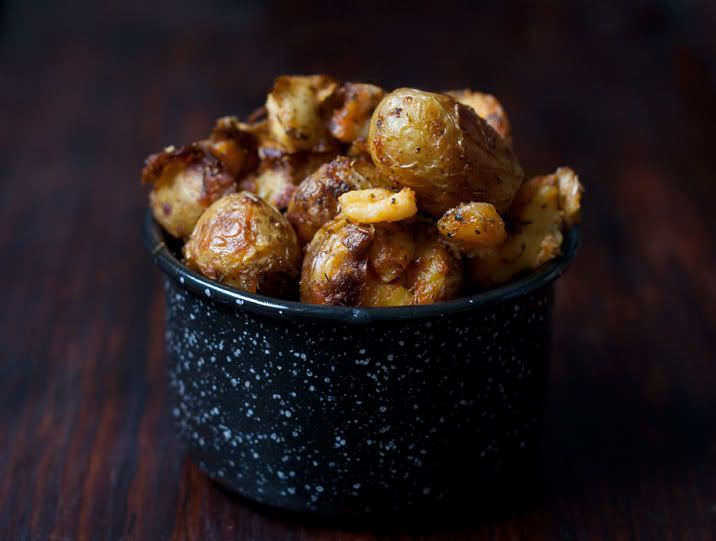


On a side note without getting on too much of a rant about health stuff. I think it's a good idea to leave potato skins on. There is no real reason to peel them unless you're really not a fan. Originally the skins were peeled because they were thought to be dirty, therefore peeling them they would be cleaner and healthier. Leaving the skins on actually has it's benefits as they help to hold in the nutrients - those being vitamin C, vitamin B6, copper, potassium and magnesium. Oh and the skins hold 50% of the potatoes’ fiber. Sounds pretty good to me! That wasn't too much of a rant I hope ... :)


I wrote this recipes and took this photo for the Ceres Fair Food, you can find it here...

http://www.ceresfairfood.org.au/recipes/

p.s ... I changed my face.

Just a quick note, if you haven'y noticed already I changed my blog header. See you soon with something delicious. x

Thursday, April 14, 2011

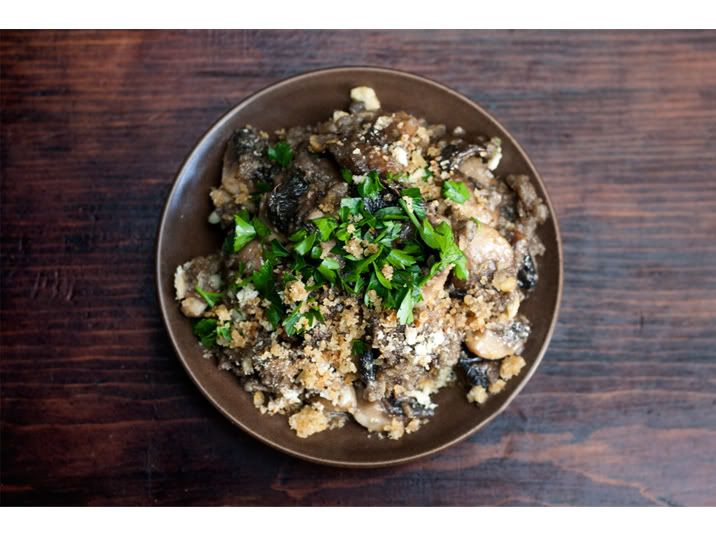
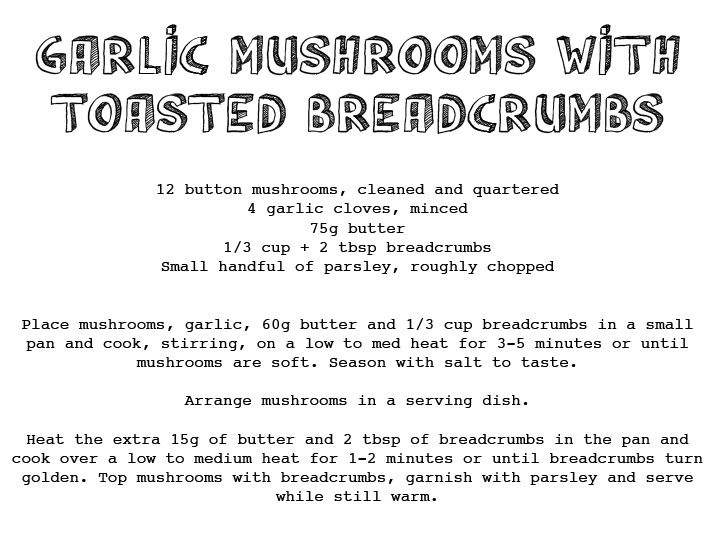
I heart mushrooms...


I wrote this recipes for the Ceres Fair Food recipe page, which you can find here...

http://www.ceresfairfood.org.au/recipes/

Wednesday, April 6, 2011

A delicious do-it-yourself salad at the table.
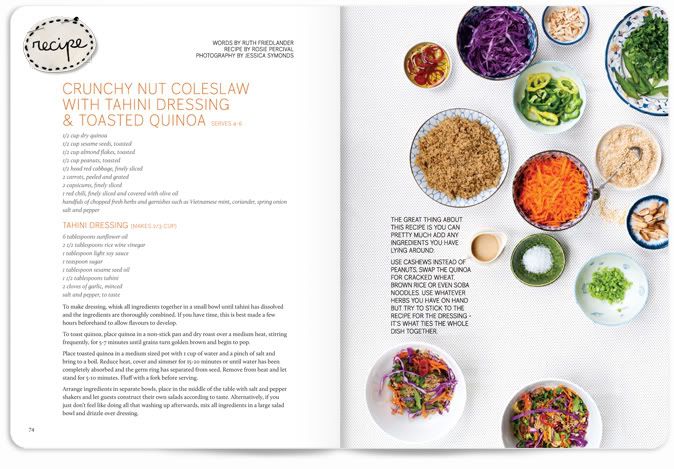


Extra Curricular is put together in Auckland, New Zealand by Ellie Smith & friends. It is for and about people doing exciting side projects in their spare time.
For issue five Ruth, Rosie and I got together to contribute a tasty recipe. Recipe by Rosie, words by Ruth and photography by me.
A delicious do-it-yourself salad at the table.

Extra Curricular is published tri-annually - issue 5 is out now!

Like them on Facebook or check out their Blog.
Oh and see if you can spot me here :)

See more of Martha Goes Green here.

James & Candace tie the knot.


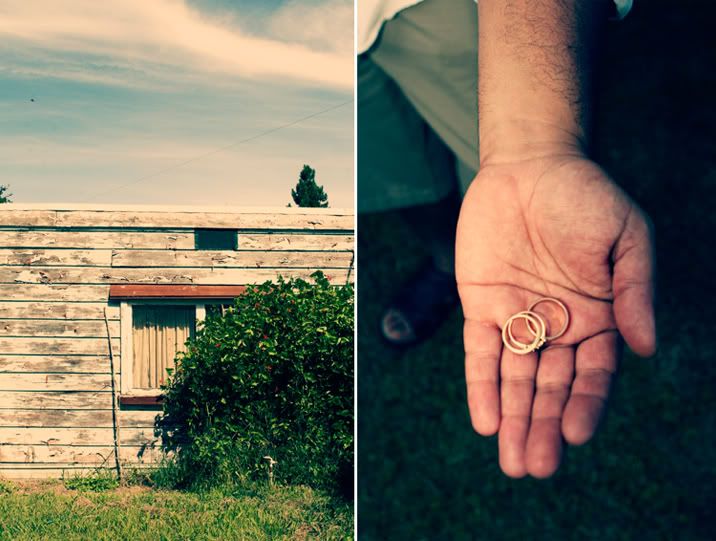
A few weeks back I shot a wedding in Hawkes Bay on the East Coast of New Zealand. It was perfect wedding weather. Hay bales, teapots, flowers, flax and even the pork on the spit! Such a great day spending time with everyone.

I enjoyed photographing people as they are rather than as they are told to pose! Candace and James’ attitude towards their wedding was awesome, it was all about having a beautiful and fun time with their friends and family. Literally a flying visit though as we had another wedding to attend in Raumati South (about 4 hours away) the next day, which was another amazing wedding to say the least. Flags, feathers, performance and a wedding cake made out of cheese! Lucky me I say!

So lately I've been in love land with my photos :) But please do stay tuned for some berry butter treats soon!


Tuesday, March 15, 2011

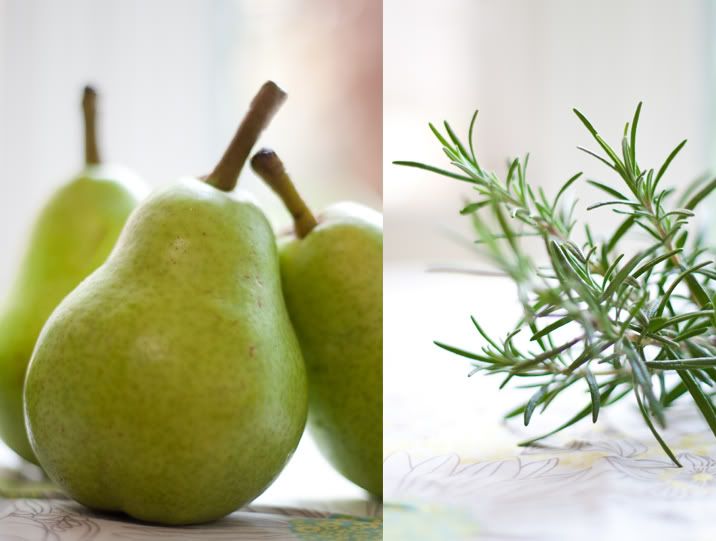
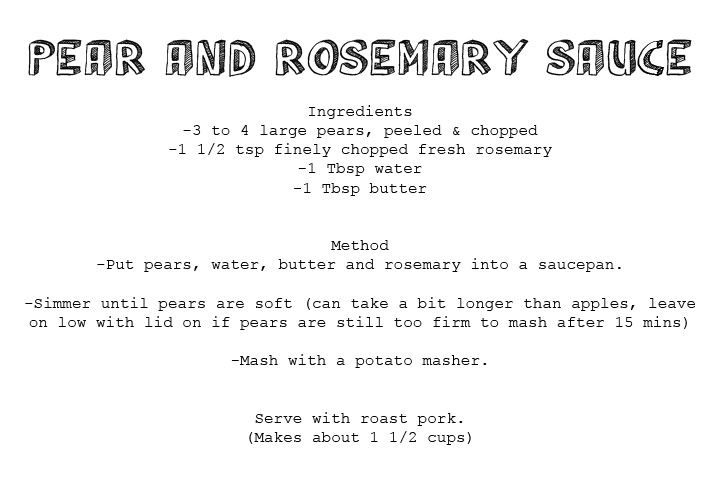
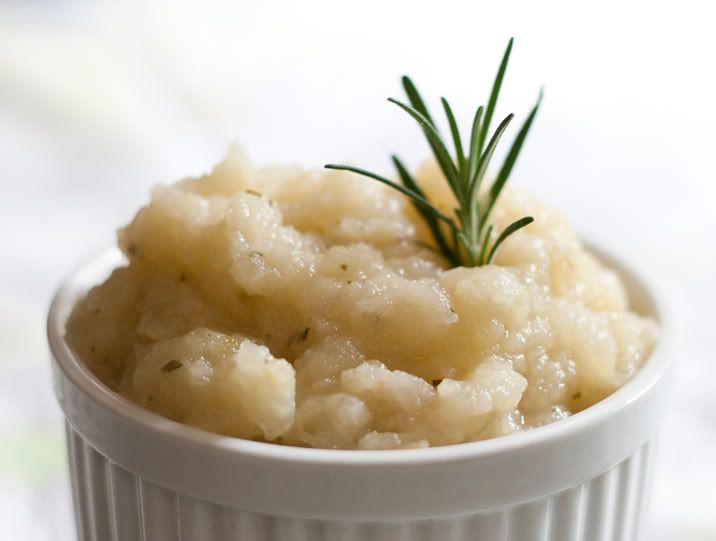
Pear & Rosemary Sauce


I've never done slow-roasted pork, so dinner tonight was just that! Six hour slow-roasted pork I might add. I used a Jamie Oliver recipe

I had intended to make apple sauce, but opted for pears over apples, simply because they were cheaper today. While making my sauce I decided to add rosemary from my garden to top it off. And it worked! Great combo for pork.

Hope you enjoy the recipe.

Monday, February 28, 2011

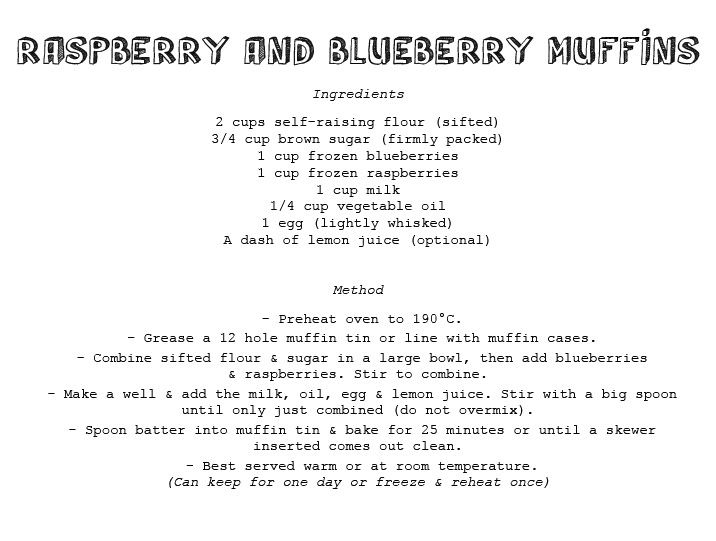
Very Berry Muffins!
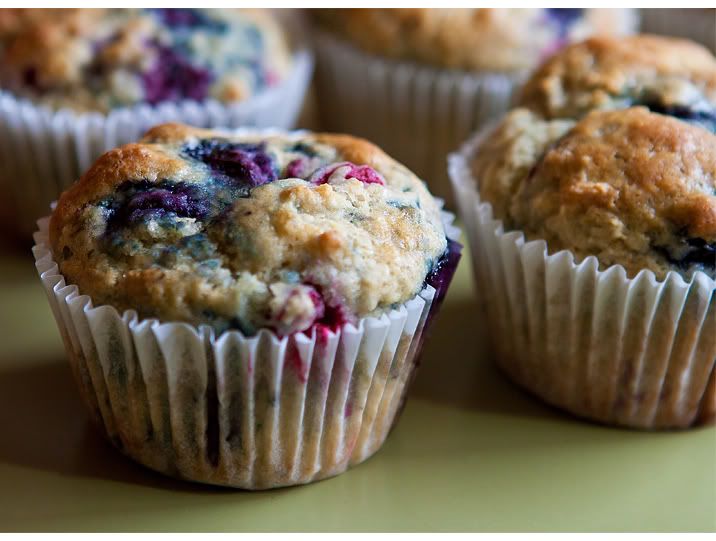


This has to be the best muffin recipe I have ever come across. They are so deliciously colourful. Whenever I make a batch they never last very long, which has to be a good sign!

The original recipe was found at taste.com.au. But as all good home-made treats go, aspects of how you make them change slightly each time. After making this one countless times this is what I've found works for me. All that's needed now is a cup for tea and a good friend to chat with. Enjoy!


Wednesday, February 23, 2011

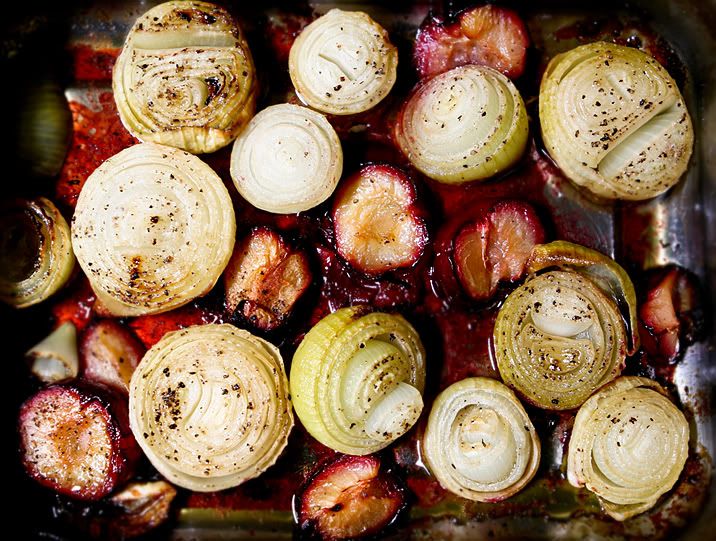
Onions take centre stage!


Perfect side dish.
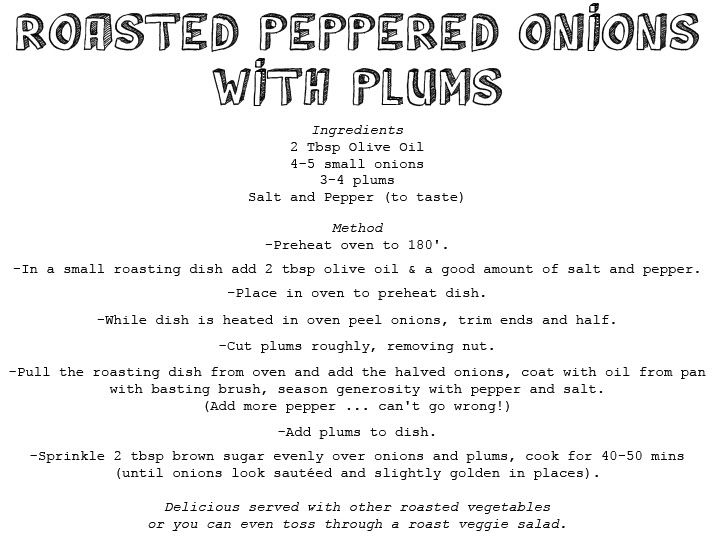
My advice for these roasted onions is to not be shy on the pepper! Delicious! Definitely can not go wrong!
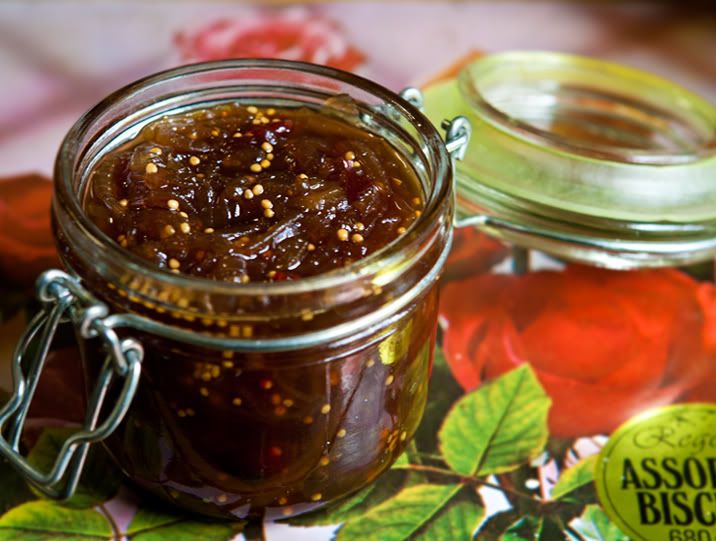
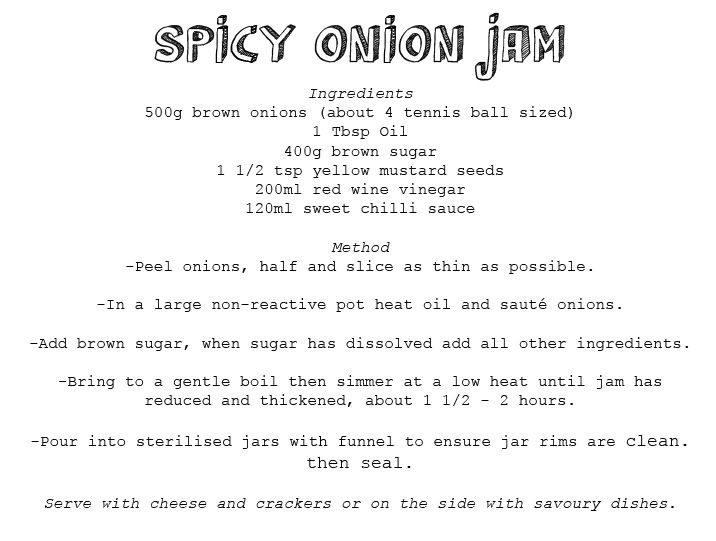
...Now to Jam!


Raw, cooked, fried, dried, roasted, caramelised or put them in stir-fry. Stick them in soups, dips, salads, baked dishes, jam, and the list goes on. Where would we be without onions!
Everyone uses them regularly. With that said I don't think they are used much as the main ingredient. And with that said here's some recipes that do...

I wrote these recipes for the Ceres Fair Food recipe page, which you can find here...
http://www.ceresfairfood.org.au/recipes/

How to test jam or sterilise jars - 'click here'

Tuesday, February 22, 2011

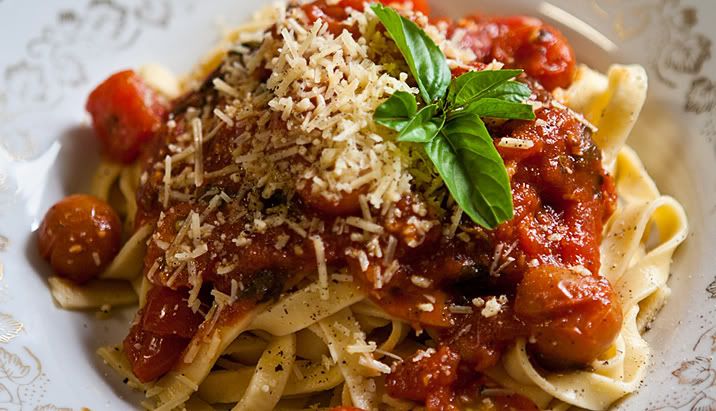
Homemade Fettuccine...
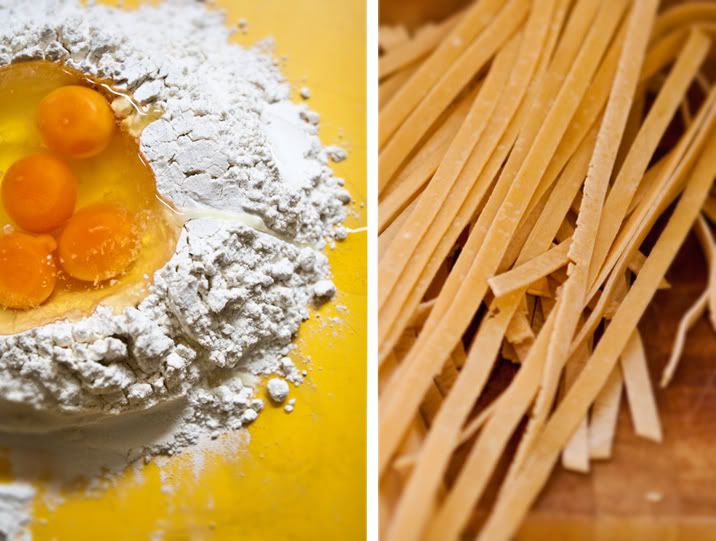


This is my first attempt at making pasta. The recipe above is written by Neil Perry.

Generally a basic pasta dough recipe is based about 100g of flour & 1 egg per person.

I actually ended up putting the eggs and flour in a food processor and blending it that way, as kneading it on the bench = too hard basket!(I may have used too much flour which would have made it difficult).

In the end, voila! This was last nights dinner...
(note the bottled cherry tomatoes in the pasta sauce, so yum)


Next time maybe pumpkin cannelloni from Martha Goes Green!

Monday, February 21, 2011

Muffins for Soup!
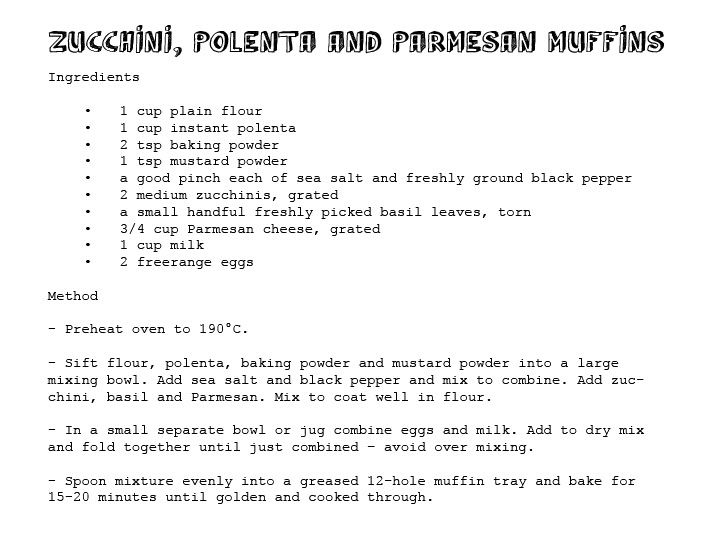


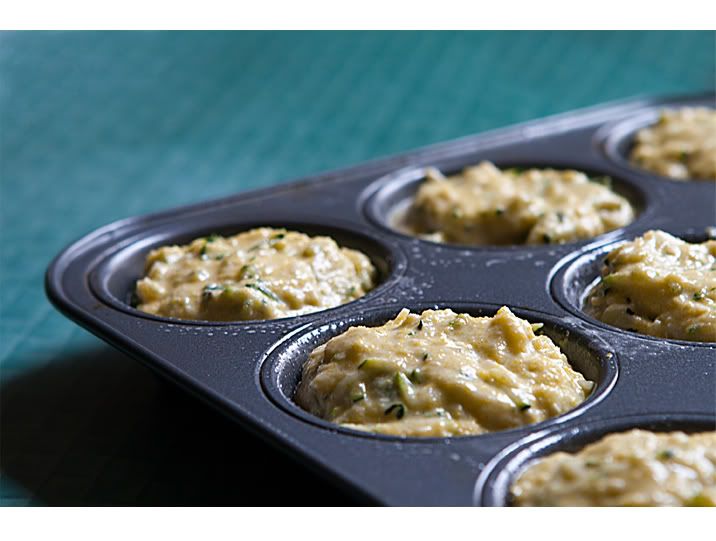
Here's a photo for mixture consistency ...


It never occurred to me to ditch the bread and have muffins with soup, but I'm told apparently it's not all that unusual!

Here's a recipe for some delicious savoury muffins that I photographed (and ate) on Sunday with some homemade tomato soup... very yum!

This recipe is written by Ruth Friedlander for Ceres Fair Food.
Check out the recipe here...
http://www.ceresfairfood.org.au/recipe/zucchini-polenta-and-parmesan-muffins/
Or more Ceres/Martha Goes Green recipes here...
http://www.ceresfairfood.org.au/recipes/

Thursday, February 17, 2011

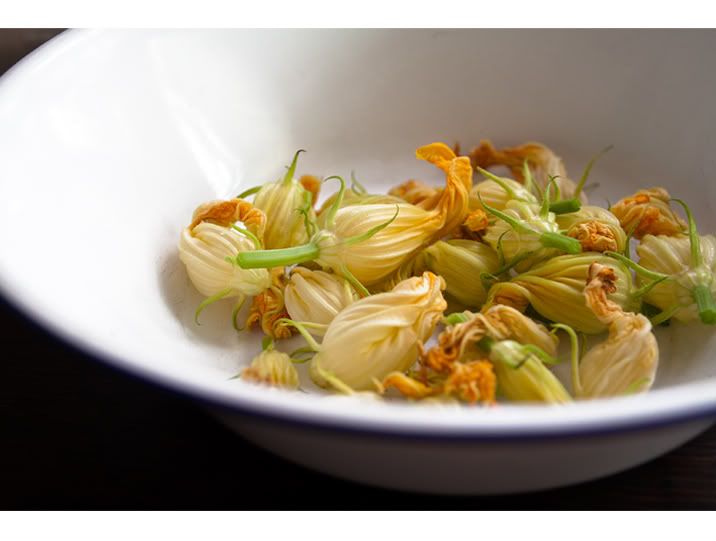
Fancy zucchini flowers.
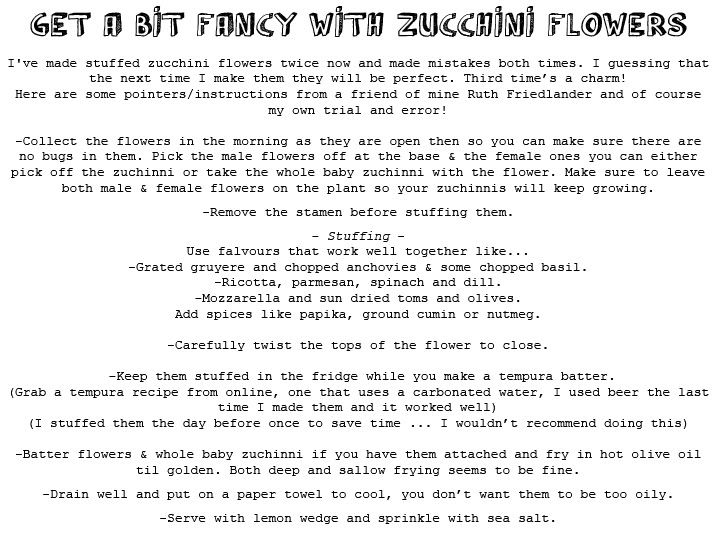


It seems I have only blogged about food so far ... can't be a bad thing I'm sure. Everybody's got to eat! And at the moment everybody's talking about zucchini flowers! The Italians were the first to use them and these days stuff them with a soft cheese like ricotta, mascarpone or fresh goats cheese. The greeks stuff them with rice and the mexicans prefer them over zucchinis which they often cook in soups or used as a filling for quesadillas. All 'n all they're a bit fancy!