
My goodness! I've been slack and haven't posted in ages. I thought I'd get things back on track by posting my lunch today. I felt like something with limes and chillies. It's such a tasty combo. So refreshing. And since I'm fighting off a cold that I may be getting I added some garlic. If you make this recipe you probably don't need to add as much as I did. :) Anyway here is the recipe.
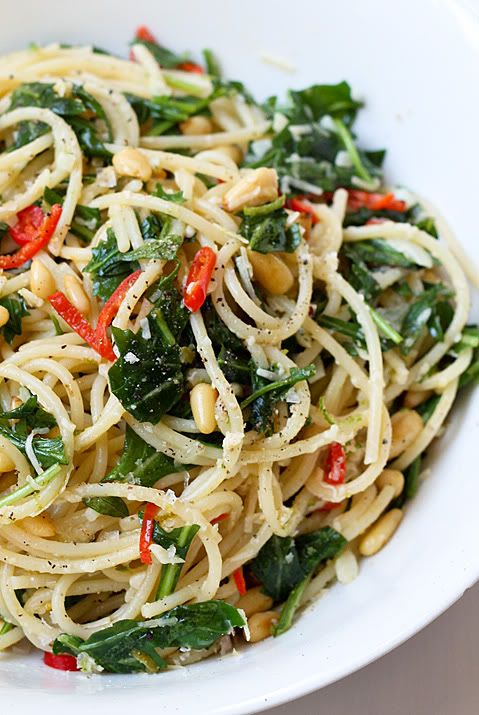
Chilli & Lime Spaghetti
Serves one hungry person (aka me today) or two for a light meal.
Spaghetti (a bunch about the diameter of a 10 cent piece)
1 tsp Salt
2 tsp Olive Oil
3 cloves of Garlic, finely chopped
2 Chilies, deseeded & finely sliced
Zest of one Lime
1/3 Rocket, roughly chopped
2 Tbsp Pine Nuts
Juice of one Lime
Salt & Ground Pepper to serve
Parmesan Cheese to serve
In a medium sized pot bring water to the boil, once boiling add 1 tsp of salt then the spaghetti. You want to cook the spaghetti until al dente, about 8-10 minutes.
While the spaghetti is on, in a frying pan heat olive oil on a medium heat, add garlic and cook for about 30 seconds. Add chilli and cook for a further 30 seconds. Turn off heat and add the zest of one lime and rocket. Mix through to combine all ingredients.
When the spaghetti is done, drain thoroughly and add to frying pan. (which is off the heat).
With tongs thoroughly coat all of the spaghetti then add it all to a serving dish.
Reheat the frying pan on a medium heat and roast the pine nuts until golden, about 1-2 minutes.
Top the dish with the pine nuts and squeeze over the juice of one lime.
Season with salt and pepper and serve with parmesan cheese.


